When I registered this domain, I had a lot of nebulous ideas about what to write about, and worried that if I discussed a lot of the things going on in engineering school, the content would be too niche. So instead I’m going in the absolute opposite direction and we’re going to talk about planning the color layouts of an extremely specific shawl pattern.
Do you love looking at carefully curated collections of hand-dyed yarn? Do you look at them and go “These are so nice, I have just the project in mind for this!”? Do you get to the point where you have to pick an order for the colors to go in, and immediately get tired and move on to another project instead? Does it sounds like I’m projecting my own problems onto a hapless, anonymous stranger?
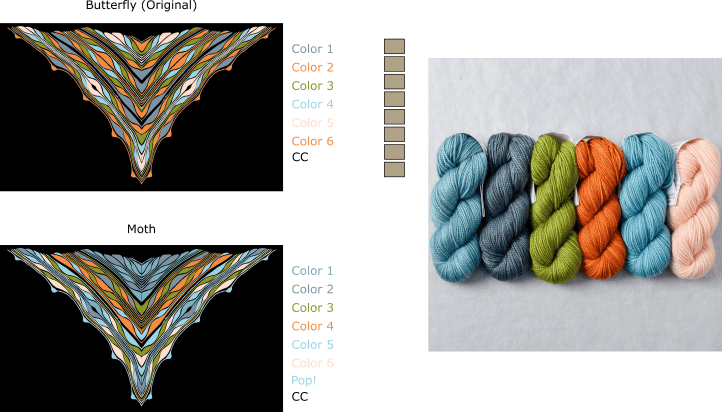
Well good news, me (and/or you), I’ve made a tool that can help plan color layouts for Marin Melchior’s Butterfly/Papillon Shawl. The tool requires downloading a piece of open source software called Inkscape, which is vector graphic software in a similar vein to Adobe Illustrator. It’s a pretty powerful piece of software, and if you can wrap your brain around it, there’s a lot of interesting and entertaining things it can be used for. But not to worry! We’ll be staying in the shallow end for this exercise.
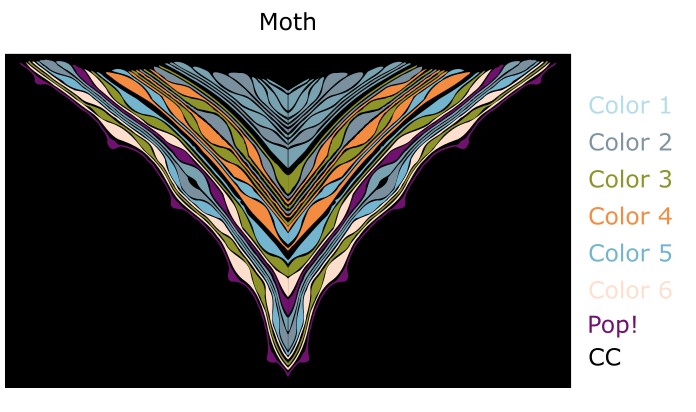
In the Moth expansion of this pattern, Ms. Melchior included a black and white image outline of the shawl, which knitters can use to color in their selections to plot out how they would arrange their yarn choices. This is great if you love coloring, and own a printer, and can keep track of which color belongs in which section. I’m not a fan of coloring, and with 30 different sections, keep track of your colors can quickly become a minor nightmare, so I opted for a different route. I have instead converted this coloring page to a vector file, and grouped the sections together so that you can try color layouts quickly using either the original Butterfly color pattern, or the alternate Moth color pattern.
Alright, let’s get to the instructions portion of this tutorial!
Materials Needed:
- Vector graphic software (Inkscape in this tutorial)
- A selection of seven or eight colors, depending on which layout you intend to use
- Some kind of sense of color aesthetics, because if you’re hoping I can give you that, you are barkin’ up the wrong tree
Tools used:
-
 The cursor. This tool can be used to select items in Inkscape, and move them around by clicking and dragging the selected items.
  The eyedropper. This tool can detect the color of an item, and transfer that color to another item.
 The zoom tool. Sometimes it can help to zoom in or zoom out to better align your view. If you click on the zoom tool, a tool bar will appear at the top of the screen with options to adjust your view. In fact, if you just hit the 4 key, Inkscape will change your view so that the entire drawing is on the screen, which can be very useful.
- The end key. Pressing the end key will rearrange the order that items are stacked onto the page.
Step one: Download and install Inkscape.
Step two: Download the Butterfly Map, and open it in Inkscape. It includes layout options for both the butterfly and the moth patterns. The Butterfly uses seven colors, while the Moth uses eight.
Step three: Think about the colors you intend to use. In this example, I am going to use Miss Babs’ Tide Pool gradient set, as I just completed a moth shawl in this color combination, with a couple of extra hues added (I used Frangula for my Pop! color and malabrigo black sock yarn for the CC).If you are using an example from a yarn shop or a picture from your own stash, you can copy and paste that image right into the Butterfly map file. If Inkscape pastes your image on top of the map, select the cursor icon from the toolbar on the left hand side of the screen, and drag the image so it is out of the way.

Surprisingly Important Step! While the yarn image is selected, press the “end” key. Inkscape will treat the latest item added to the file as the item on top – think of it like putting a piece of paper onto an existing stack of papers. This will impede the next step, where we want to place one of our palette selection boxeson top of the pasted image. Pressing the ‘end’ key will move the yarn image to the bottom of the stack.
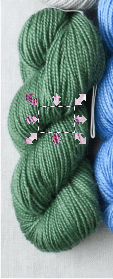
Step four: It’s time to load the palette. The eight boxes in the center are meant for assigning colors, so that you can have them organized neatly when it comes time to toy with layouts. When it comes to making selections, I like to drag the box I’m working with directly onto the object I’m trying to select from. There’s a lot of variation in shades in a picture of a skein of yarn, so you may end up needing to use the eyedropper tool a few times before you end up with something that you are happy with. Using the cursor tool from the toolbar on the left, drag one of the boxes onto a skein of yarn.
Once the box is in place on the skein and making sure that it is still actively selected (it should still have a dotted line outlining it), switch to the eyedropper tool from the left hand tool bar. When you switch tools, the arrows around the palette box should disappear, but the dotted line should remain. When clicked, the eyedropper will select a color form one item and transfer it over to the selected item. Click on the skein a few times until you land a close approximation of the color inside the palette box. (If you select one and think it’s not quite right but then the next one is even worse, it’s okay liberally use the undo (control-Z) function to flip back to earlier attempts!)
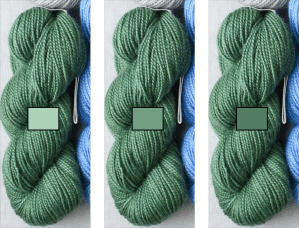
There’s a bit of Goldilocks in this section. Sometimes the color will be too dark, sometimes it will be too light, but eventually, you’ll find an option that is just right, or right enough for an experimental layout.
Fancypants option: If clicking randomly isn’t working out well for you, another option is to click and drag on the skein, which should make a circle appear with the clicked point as the center. Inkscape will calculate an average color for the area, which can save you some time and swearing. Try to avoid the darker areas of the skein, as these seem to alter the color more rapidly than the lighter areas do.
Repeat this step for all of the colors you intend to use.
Once all of the colors are selected, I like to move the palette boxes back towards my layout.
Step five: Let’s get planning! Switch back to the cursor tool, and click the text for the color that you want to assign first. The text is grouped with the corresponding rows, so you should see a large selection box appear when you click on the text. For instance, in this picture I have clicked on ‘Color 1’:
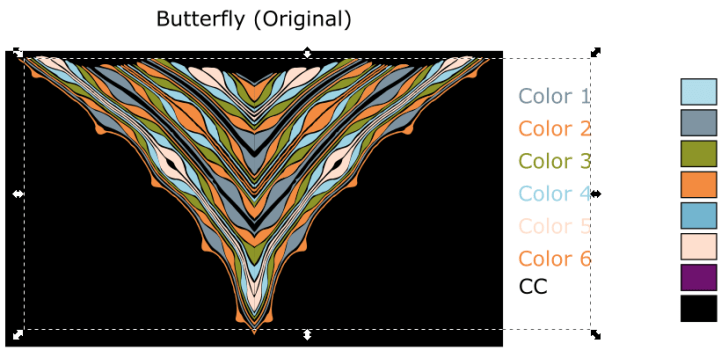 Switch to the eyedropper tool and select one of the colors from the palette. Then, switch back to the cursor tool, click on Color 2, and use the eyedropper tool to select a color for it. For the first attempt, I have just started at the top of the colors, and gone to the bottom. Since I’ve got colors in all eight boxes, I’m going to switch to the moth colorway.
It’s a good first start, but after sending the file to the recipient of this project, we moved color 6 to slot 4, color 4 to slot 5, and color 5 to slot 6.
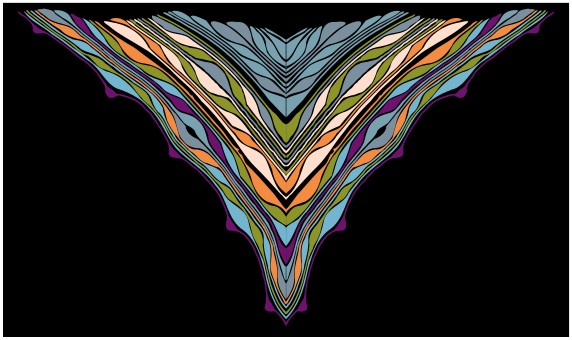
Once the colors are loaded into the palette, adjusting the order goes very quickly. If you find an arrangement that you like, I find that it’s useful to just drag the cursor over the whole kit and kaboodle, copy it, and paste it elsewhere on the screen. That way you have a record of a layout that you liked, and you can compare it to future versions easily.
Questions? Comments? Let me know! Inkscape is a peculiar tool, and the more I use it the more I learn about what it can do. If your comment is “I would have selected a different order,” too late! I just blocked it this morning! I’m not going to make another one for at least six months!
